“Tin Can Cooking,” Ensign, June 1974, 43
Tin Can Cooking
Tin can cooking can be one of your summer delights, because it gets Mom out of the sandwich routine and Dad away from the smoking grill. Children as young as six years of age can learn to use these handy substitutes for pots and skillets on any camping trip, at any picnic, or even on a backyard adventure. A tin can can become a frying pan, a saucepan, and an oven.
On the top of the stove you can cook regular favorites such as pancakes, bacon and eggs, and tacos. Or experiment with these recipes:
French toast: One egg, two tablespoons of milk, and a dash of salt and pepper will make the basic mix for four slices of bread. Oil the stove surface lightly before cooking.
For variety, place the egg-covered bread in partially crushed cornflakes before cooking.
Eggs in a basket: Make a V out of a bacon strip and fry it to the desired crispness. Remove the center of a slice of bread and lay the slice over the cooked bacon on top of the stove. Break an egg into the hole, season it, and cook it, turning it if desired.
Bacon and egg sandwiches: Cut bacon into small pieces and fry them to the desired crispness. Break an egg on top of the bacon, season it, and scramble it. Turn the mixture. Place cheese on the egg if desired, and top it with a slice of bread. To toast the bread, turn the sandwich over so the bread is next to the top of the stove.
You can bake any food with the tin can that you normally do, including this unusual recipe, simple and tasty:
Pineapple upside down cake: Oil the inside of a tuna fish can and place a long strip of aluminum foil about one inch wide across the bottom of the can and up the sides with both ends projecting to can and up the sides with both ends projecting to use in lifting the cake from the can. Place one slice of pineapple in the bottom of the can with a maraschino cherry in the center. Sprinkle the pineapple with one tablespoon of brown sugar. Next, wet the sugar with pineapple juice, then fill the can two-thirds full with any cake batter. Place the can on top of the rocks, cover with the oven, and bake for about 20 minutes or until the cake is firm to the touch and light brown on top.
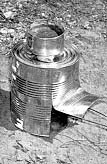
Stove: Cut one end from a # 10 (one gallon) tin can with a can opener. The open end is the bottom. Next to the bottom, cut a small door 3 inches high and 4 inches wide with tinsnips. Bend out and up. With a V-can opener, punch holes opposite the door next to the top for ventilation.

Stove
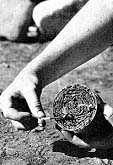
Buddy-Burner (fuel): Remove the lid from a tuna fish can and save it. Cut a strip of corrugated cardboard across the corrugations, about 1 1/2 inches wide and 4 1/2 feet long. Roll it tightly, and place it in the can. Fill the can with melted wax. When the wax cools, light it by turning the can on its side so the match flame will reach the wax. One full can will burn 1 1/2 to 2 hours. Refill the can by putting small chunks of wax into the flame and melting them. The cardboard will last indefinitely.

Buddy-Burner
Damper: This is essential for controlling the flame. Make a handle by bending a coat hanger or heavy wire into a hair-pin shape. Wire the u-shaped end to the lid by punching small holes in the lid. Bend the handle end down. A more temporary damper consists of three or four layers of aluminum foil in a 12 to 15 inch strip; bend the last two inches down at a 45-degree angle for a handle. Slide the damper back and forth over the buddy-burner to regulate heat.

Damper
Oven: Remove both ends from a can similar to a shortening can, cover the top with transparent oven-bake wrap, and wire the wrap into place. Make a handle by inserting wire ends under the wire holding the wrap in place—Put three or four pebbles on the stove top, and put food in a tuna fish can, on a lid, or on aluminum foil. Place the food container on the rocks, and cover with the oven.

Oven